To send a email, you can:
- Compose a new message
- Reply to a received message
- Forward a message
Composing new messages
To compose a new email message:
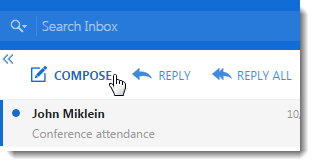
- In Kerio Connect Client Email section, click Compose above the list of incoming messages. This opens an editing window in your Kerio Connect Client.
- To open the message in a new window, click
 .
.

- If you have multiple addresses defined (see Defining addresses below) or are a delegate, you can select from which address you want to send the message.
- In the To: and Cc: text boxes, type the email addresses of recipients. As you type, Kerio Connect Client offers you matching addresses from your contacts.

- Click the plus icon icon to select email addresses from your contacts folder.

NOTE
To protect the privacy of some recipients, you can hide their email addresses from other recipients by using the Bcc field: click Options > Bcc and type the email addresses in the Bcc text box.
- Type the Subject of your message.
- Write your message in the main text area.
- You can insert images directly in the text. Kerio Connect Client displays the images in their original size.
NOTE
New in Kerio Connect 9.1!

- Use the following options as needed:
- To attach files to your message, drag files from your computer to the compose window or click Attachment and select your files.
- Digitally sign your message by clicking Security > Sign. For more information refer to Digitally signing messages in Kerio Connect Client.
- Encrypt your message by clicking the Security > Encrypt. For more information refer to Encrypting messages in Kerio Connect Client.
- Click the three dots to see addition options:
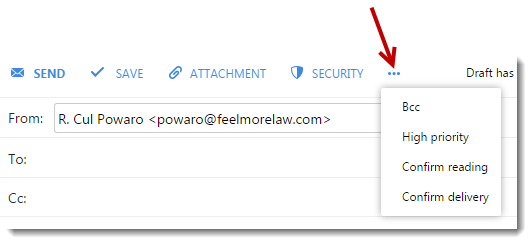
- Give the message a high priority,
- Request a read receipt (the Confirm reading option) and a delivery confirmation receipt (the Confirm delivery option). In the Email section of your Kerio Connect Client settings, you can select both option to be used automatically.

- Click Send.
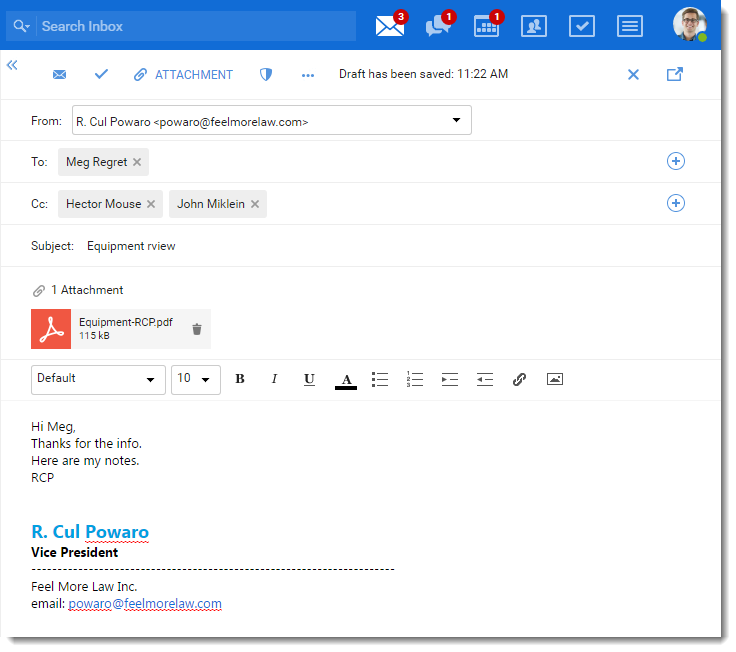
Kerio Connect Client regularly saves drafts of your messages. If you want to send your message later, click Save. The message is saved to your Drafts folder.
If you specify an email signature in your settings, Kerio Connect Client automatically adds that signature to each message you compose. For more information refer to Configuring email signature.
After you click Send, Kerio Connects sends the messag e to all the recipients and saves a copy to your Sent folder.
NOTE
Kerio Connect Client does not currently support spell checking.
Defining your addresses
When sending messages, you can set both From and Reply-To addresses that are different from your default address.
Reply-To address
To set a Special Reply-To address:
- Click your name in the top right corner and select Settings.
- Go to Email.
- In the Composing section, type an email address in the Special Reply-To address field. Replies to messages will now go to this Reply-To address, not the From address.
- Click Save.

This applies to all the messages that you send from now on.
You can change or remove the addresses anytime.
From address
When composing a message, you can select which address Kerio Connect sends the message from.
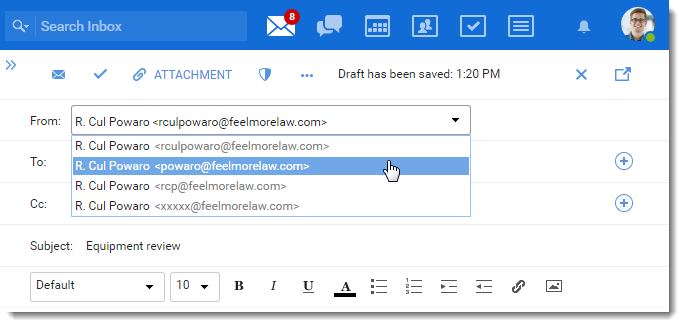
From addresses can be defined in two ways:
- In Kerio Connect Client, you can add a Default From address (Settings > Email > Composing), or send messages on behalf of another user if that person has made you their delegate. (For more information refer to Using delegation in Kerio Connect Client.)

- Ask you administrator to add a new email address in your Kerio Connect account settings.
Replying to messages
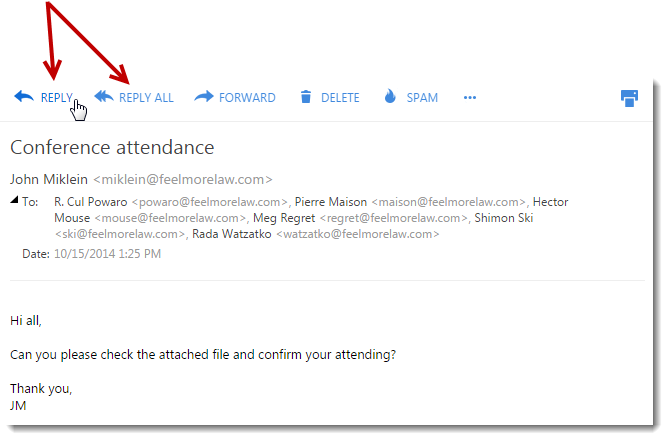
To reply to a message, click Reply.
If the message has multiple recipients and you want to send your reply to all of them, click Reply All.
Kerio Connect Client automatically adds Re: before the message subject and copies the original message into the message body.
Forwarding messages
If you want to send a message you've received to a third person, you can forward the message.
- Select the message you want to forward.
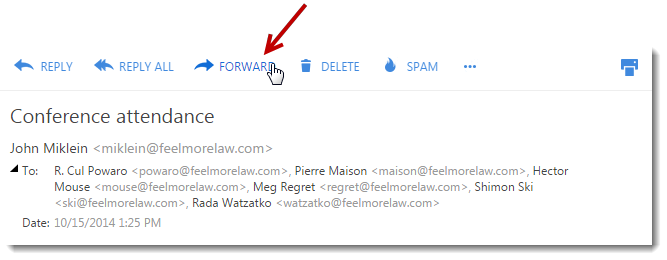
- Click Forward. This opens a new message window. Kerio Connect Client automatically adds
Fwd:before the message subject and copies the original message into the message body.
- Add recipients as needed.
- (Optional) Add your own message above the forwarded message.
- Click Send.
The message appears in your Sent folder with the date and time.
NOTE
To resend a message with the original subject and message body (no Fwd: before the subject), right-click a message and select Edit as New. This opens an editing window where you can add recipients and edit the message (see Composing new messages above).
Creating calendar events from messages
You can create a calendar event and invite all the message recipients and senders to the event. For more information refer to Using calendars in Kerio Connect Client.
Sharing email folders
You can share your email folders and display emails others share with you. For more information refer to Sharing in Kerio Connect Client.


