


NOTE
New in Kerio Connect 8.5.2!
As an alternative to Exchange ActiveSync, the Kerio Connect Sync application for Android devices uses CalDAV and CardDAV to:
- Synchronize your tasks, calendars, and contacts
- Synchronize public folders
- Push notifications to immediately synchronize changes
- Synchronize calendar colors
Kerio Connect sync is a free application available on Google Play.
Installing the application
To install Kerio Connect Sync, download the app from Google Play.
Configuring your account
NOTE
This article is based on Android 5.0.2
To start synchronizing:
- On your Android device, open Kerio Connect Sync.
- Type your email address and tap Next.
- Type your password and tap Next.
- Verify (or type) the server name, your username and password, and tap Sign in.
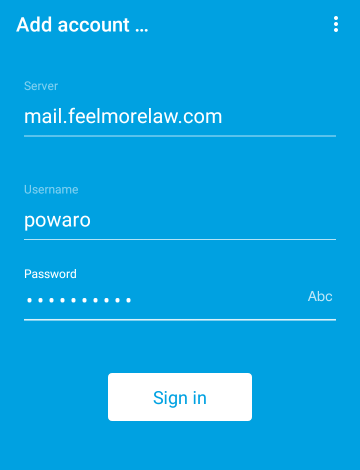
- Confirm the certificate for your server if warning appears.
- Select the task and calendar folders to synchronize with your device and tap Next. You can change the settings any time later.
- Select the contact folders to synchronize with your device and tap Finish. You can change the settings any time later.
- Tap Done.
Kerio Connect Sync is ready to synchronize your tasks, contacts, and calendars.
Adding additional accounts
You can synchronize tasks, calendars, and contacts from multiple accounts with Kerio Connect sync.
To add a new account:
- On your Android device, open the Kerio Settings app.
- Tap Add account.
- Follow the same procedure as described above.
Removing accounts
To delete an account from Kerio Connect Sync:
- On your Android device, open the Kerio Settings app.
- Tap Remove account.
- Tap the account you want to remove.
- Tap OK to confirm the deletion.
Selecting folders for synchronization
Tasks and calendars
You can select the folders to synchronize with your Android device in your calendar or task application settings.
You can also select the folders in the Kerio Connect Sync application:
- Open the Kerio Settings app on your Android device.
- Tap the gear icon next to your email address.
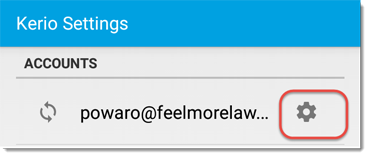
- Tap Select calendars to sync. The list with calendar and task folders opens.
- Select folders to synchronize.
To select the task folders to synchronize, you can also:
- Open the Tasks app on your Android device.
- Go to the settings.
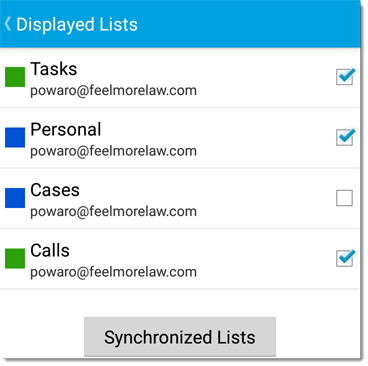
- Tap the Displayed Lists option. The list of all your task folders appears.
- Select the folders you want to synchronize.
Contacts
You can select the folders to synchronize with your Android device in your contacts application settings.
Switching off the synchronization
To start/stop synchronizing tasks, and calendars in general:
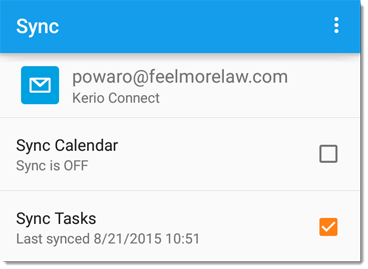
- Open the Kerio Settings app on your Android device.
- Tap your email address.
- Select the desired options.
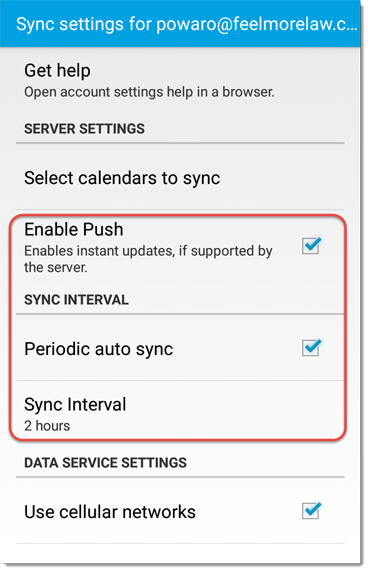
Setting the synchronization interval
Kerio Connect sync can synchronize the folders to your Android device periodically and you can select how often:
- Open the Kerio Settings app on your Android device.
- Tap the gear icon next to your email address.
- Select Enable Push to immediately receive updates upon change. This option depends on your server settings.
- Select the Periodic auto sync option.
- Tap Sync interval and select how often to synchronize your account.
Creating contacts and calendar events
Your contacts and calendars synchronize to you mobile device. Open your device's contact/calendar application to create, edit, or remove contacts and calendar events.
Creating tasks
Kerio Connect Sync contains the Tasks application where you can add, edit and remove your tasks.
To create a new task:
- On your Android device, open the Tasks app. The application with your task folders opens.
- Tap the plus sign.
- Select the task folder.
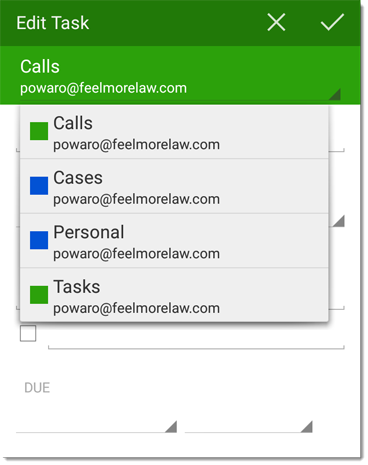
- Type the name for the task.
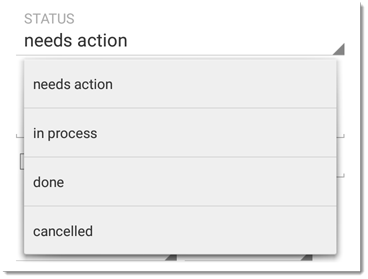
- Select the task status.
- Add a description.
- Select the due date and time.
- Save the task by tapping the tick sign .
- Tap OK to confirm the deletion.
Editing tasks
To edit a task:
- Open the Tasks application on your Android device.
- Tap the task folder.
- Tap the task you want to edit. The task detail screen opens.
- Tap the pencil icon .
- Edit the task.
- Save the task by tapping the tick sign .
Kerio Connect Sync opens the task for editing.
Completing tasks
To mark tasks as complete:
- Open the Tasks application on your Android device.
- Tap the task folder.
- Tap the task you want to mark as complete. The task detail screen opens.
- Tap the icon.
Displaying completed tasks
By default, completed tasks disappear from your task lists. To see them again:
- Open the Tasks application on your Android device.
- Go to the settings.
- Enable the Show completed tasks option.
You can see completed tasks in the task folders

